This news article was originally written in Spanish. It has been automatically translated for your convenience. Reasonable efforts have been made to provide an accurate translation, however, no automated translation is perfect nor is it intended to replace a human translator. The original article in Spanish can be viewed at
La medición dimensional: del codo a la micraThe dimensional measurement: the elbow to the micra
With this article, in which we try to succinctly explain the evolution of dimensional since ancient times measuring instruments to a century, we close this section under the title of "100 years ago" has appeared in our pages this year. With it we have tried to contribute modestly to the commemoration of the 100th anniversary of Ford Motor Company, a momentous milestone in the evolution of the industry in general and the metalworking sector in particular. From the next issue a new section, which we will call "a look at the history", allow us continue to discover more recent or remote past of the machine tool and the companies and the men that have marked its evolution over time.
"Man is the measure of all things" said Protagoras five centuries before Christ. Following this maxim, humanity has been used for millennia anthropometric units to describe a particular dimension, so that feet, elbows, palmos or fingers have been used, virtually until the 19th century, as common patterns of measurement. It was in 1799 when an International Scientific Committee defined and designed a unit of measurement, the subway, in virtue of which it was constituted a universal system of measures, the metric system, and with it the centimeters, the mm and later the micronsthey became part of our common vocabulary. However, since much earlier, the man afanó in search forms and tools to measure pieces or items of small dimensions. Many of these tools, whose evolution we will describe below, follow us, even today, proving extremely useful.
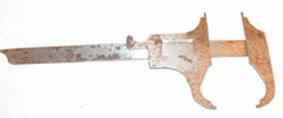
The first foot of King was designed in the 17TH century by the Frenchman Pierre Vernier, implementing the system of double scale invented a century earlier by Portuguese Nonius
The foot of King is one of the most common measure utensils in any workshop since its invention in the 17TH century
The foot of King
The foot of King or gauge is the most popular linear measurement to be found in any workshop. It allows to obtain easily, through a system of mobile terminal block, internal, external and depth measures. The invention of the sliding scale (or Vernier) opposed to a fixed scale, allowing increasing the measure in an order of magnitude, is due to the Portuguese Pedro Nunes, in Latin Petrus Nonius, (1492-1577), who had designed a system for measuring fractions of a degree in two nautical instruments in heightthe astrolabe and the quadrant. Based on this system, the French mathematician Pierre Vernier (1580-1637) invented the current foot of King, an ingenious device that consists of a small scale, with ten divisions, which can be moved along a fixed scale, graduated with nine equivalent divisions. In honor of their creators East mechanism is usually being referred to as either Nonius or Vernier.
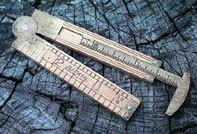
Former rule on the foot of King of Lufkin
The first micrometers
Of increasing sophistication, although by no means less known, is the micrometer, based on the concept of measuring an object using a screw thread, a concept used for the first time in history the English William Gascoigne (1619-1644) for astronomical measurements. However, the mechanical application of the caliber of screw did not occur until 1797, when the pioneer in the manufacture of lathes, Henry Maudslay designed a micrometer, built in 1800, and known as "Lord Chancellor", which allowed to measure up to the diezmilésima of an inch. In fact, the need for very precise measurements did not emerge until the moment at which the interchangeability of parts, especially in weapons, began to require minimum tolerances in the manufacturing of these. This was in turn the cause of development, at the same time, of the metric system.
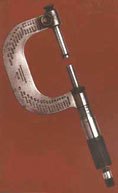
The popular micrometer screw palmer, commonly used to measure external diameters, or Pocket was invented by the French mechanic Jean Laurent Palmer in 1848. Presented at the exhibition in Paris, he called the attention of Joseph Brown and his assistant Lucius Sharpe, who began to manufacture in bulk from 1868. A decade later, the micrometer of Brown & Sharpe was a common instrument in the metallurgical industry, both in Europe and in America.
The micrometer of pocket was invented by the French mechanic Laurent Palmer and was manufactured industrially by Brown & Sharpe from 1868
1885 Brown & Sharpe micrometer
The coordinate measurement
The system of representation by coordinates was invented by the well-known French philosopher and mathematician René Descartes (1596-1650) in the early 17TH century. The position of a point in space is defined, in Cartesian coordinates, by the relative values of the three axes X, and z with respect to a reference system. Using series of dots, it is possible to construct the geometric element that passes through them or close to the maximum. A machine of measure for coordinates, three-dimensional also called, is a measuring instrument capable of determining the dimension, shape, position and "attitude" (perpendicular, planarity, etc.) of an object by measuring the position of different parts of its own surface. Based on this principle, Brown & Sharpe produced in 1875 which would be the first machine of coordinate measurement, for the company Bristol Herreshoff, manufacturer of boats and yachts of most known competition in the world. The measuring system developed by Brown & Sharpe helped Captain Herreshoff to build winning boats of the America's Cup from 1893 to 1920.

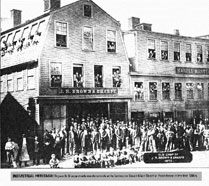
Brown & Sharpe owe the industrial introduction of the micrometer. In the picture we can see the old factory of Brown & Sharpe in Providence in 1872.
Verification of flatness
oseph Whitworth (1883-1887), disciple of the aforementioned Maudslay and famous for having developed the threads system which bears his name, he had a special concern for finding a mechanism that would ensure the perfect flatness of a surface. After carefully studying the problem, presented in 1840 a statement to the British of Glasgow Association entitled: "One true flat surface, rather than being in common use is considered to be virtually unknown", in describing the method for obtaining a flat surface on the basis of three flat metal parts. Patxi Aldabaldetrecu described in his book "Machines and men": "they chose one of them as patron and the other two to compare with the first, carrying out a process of rubbing parts, eliminating the ridges that glide remained visible"by rasqueteado. "Then they took the two latest pieces to contrast with each other and finally takes the model chosen arbitrarily for checking with the other two." This procedure is currently used to fabricate marbles of grey cast iron, basic element to get rasqueteado by flat surfaces.
Gauge blocks are due to the Swedish Carl Edvard Johansson who, at the end of the 19th century, devised a system of patterns for the production of Mauser rifles
Gauge blocks
The precedent to the current gauge blocks appeared in Sweden to 1700, when Christopher Polhem (1661-1751) began to use pieces of standard length as an element of measurement, at a time when the demands of accuracy were rather scarce. It took almost two centuries to make also a Swede, Carl Edvard Johansson (1864-1943) designed the first game of gauges, later known as gauge Johansson. In 1894, the Swedish Government passed an important order for rifles to the Mauser Germany company. Johansson was part of the Swedish Committee on inspection of the weapons and noted the huge amount of gauges that were needed to manufacture rifles and devised a system that allowed, with a small number of gauge blocks, get all the combinations necessary to make all the pieces. In 1896 was made the first game, with an accuracy of 0.001 mm. From 1907, the American automobile industry began to heavily use this new system of measurement.

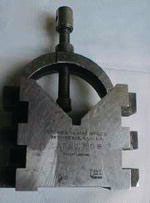
Block v for verification of angles of Brown & Sharpe, from the beginning of the 20th century.
The comparison of areas was already used by manufacturers of watches in the early 19th century, although its industrial application was delayed until the last decades of this century. The American John Logan patented in 1883 a first model that used a system of network transmitting the movement of the spindle to the hand
The clock comparator
The comparison of areas was already used by manufacturers of watches in the early 19th century, although its industrial application was delayed until the last decades of this century. In 1883, the American John Logan patented a first model that used a system of network transmitting the movement of the spindle to the hand. Later, the chain system was replaced by a toothed segment transmitting the movement to a pinion mechanism. To Logan bought the patent his partner Frank Randall, who, along with Francis Stickney, started this type of instrumentation to measure industrial manufacturing. From 1904 he began to manufacture clocks comparators German company Karl Zeiss, dedicated from 1846 to the manufacture of optical and mechanical precision instruments, and present in Spain since 1892
References
